What is CentOS Web Panel
CentOS Web Panel (CWP) is a free, open-source web hosting control panel designed for managing servers running CentOS and other Red Hat-based Linux distributions. It provides a graphical interface that simplifies server management, particularly for system administrators and web hosting providers. CWP allows users to easily manage server configurations, websites, email accounts, databases, and other critical services without needing to use the command line.
Table of Contents
Key Features of CentOS Web Panel:
- User-Friendly Interface: Offers a modern and easy-to-navigate dashboard for managing server functions.
- Web Hosting Management: Allows the creation and management of websites, domains, FTP accounts, and more.
- Database Management: Includes tools for managing MySQL and PostgreSQL databases, including the ability to create, delete, and modify databases.
- Email Management: Users can set up and manage email accounts, autoresponders, and spam filters.
- Security: Includes firewall management, CSF (ConfigServer Security & Firewall), and other security tools to help secure the server.
- Software Management: Provides easy installation and management of software packages and services like Apache, Nginx, PHP, MySQL, etc.
- Backup System: Integrated backup and restore functionalities for the entire server or specific data.
- Multi-User Support: You can create and manage multiple user accounts with different levels of access, from system administrators to resellers and clients.
- Monitoring: It offers monitoring tools to track server performance, usage statistics, and log files.
Use Cases:
- Web Hosting Providers: CentOS Web Panel is popular among hosting companies that offer shared or VPS hosting.
- System Administrators: It provides system administrators with an easy way to manage server configurations without needing to interact directly with the command line.
- Web Developers: Developers often use it to deploy and manage web applications, databases, and email services on their servers.
Supported Operating Systems:
While it’s primarily designed for CentOS, CWP is also compatible with other Red Hat-based Linux distributions, such as:
- CentOS
- RHEL (Red Hat Enterprise Linux)
- CloudLinux
- AlmaLinux
- Rocky Linux
Limitations:
- CentOS Only: While it works with multiple Linux distributions, it is most effective when used with CentOS or CentOS-based systems.
- Not as Popular as cPanel: While CWP is feature-rich, cPanel remains the most widely used control panel in the industry, particularly for commercial hosting providers.
How to install CWP?
Step 1: Setting up Hostname
In order to initiate the CentOS web panel installation, you need to first log in to your server as root. Further, you have to ensure that you set the accurate hostname.
You must note that the domain name and the hostname have to be distinct from each other on your server. For instance, suppose your domain name on your server is domain.com, then employ hostname.domain.com as your completely adequate hostname.
You have to enter the statement as –
# hostnamectl set-hostname ser.domain.com
# hostnamectl

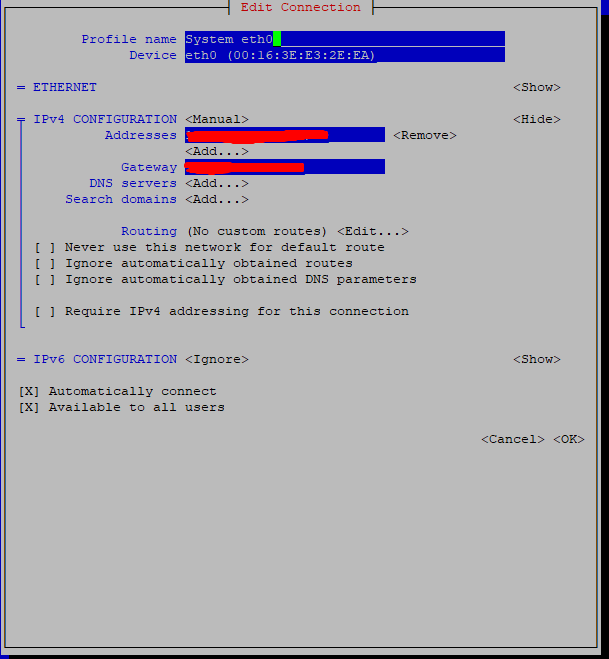
Step 2: Setting up Server IP Addresses
For setting up a network, you need to employ the nmtui (NetworkManager Text User Interface) utility. This lets you have a graphical user interface for configuring networking while controlling Network Manager.
You have to enter the following statement to do so –
# yum install NetworkManager-tui
# nmtui


Step 3: Installing CentOS Web Panel
Once you get done with setting up the hostname and static IP address, you have to install the wget utility along with updating your server to the latest version. This helps in fetching and installing the CentOS web panel installation script. You need to enter the statement as –
# yum -y update
# yum -y install wget
# cd /usr/local/src
# wget http://centos-webpanel.com/cwp-el7-latest
# sh cwp-el7-latest


You have to keep calm as the installation process can last from 10 minutes to 20 minutes. After the installation is done, your screen should flash “CWP” installed and other files of credentials needed to access the panel. Moreover, you must copy all the details or write them down and keep them secure with you. You can then press “ENTER” for server reboot the moment you get ready. In case your system does not reboot automatically, you can enter the command as –
# reboot
Step 4: CentOS Web Panel Configuration
After the reboot of your server, you can log in to your server as root. Once you log in like this, you can encounter a different welcome screen. The screen will display the details about the logged users and the current disk space usage.
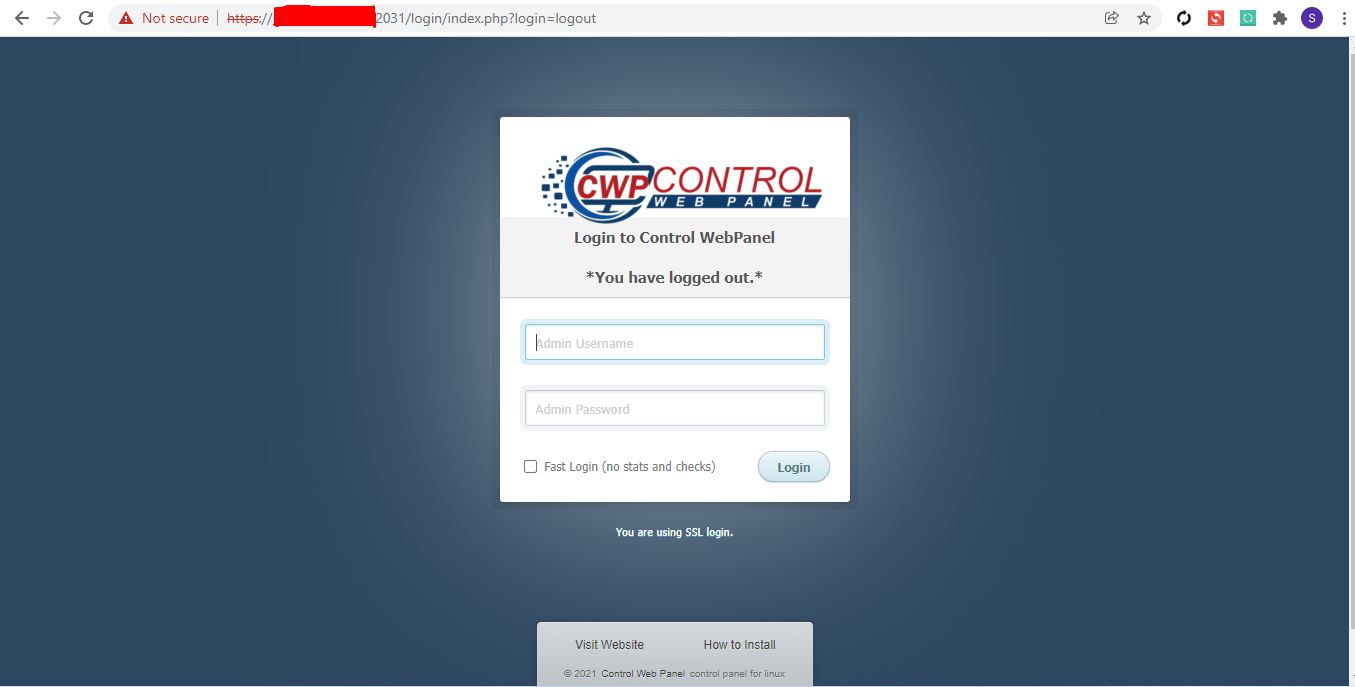
At last, you can log in to your CentOS Web Panel server by employing the link that your installer provides on your server. For instance –
CentOS WebPanel Admin GUI: http://SERVER-IP:2030/
Username: root
Password: your root password
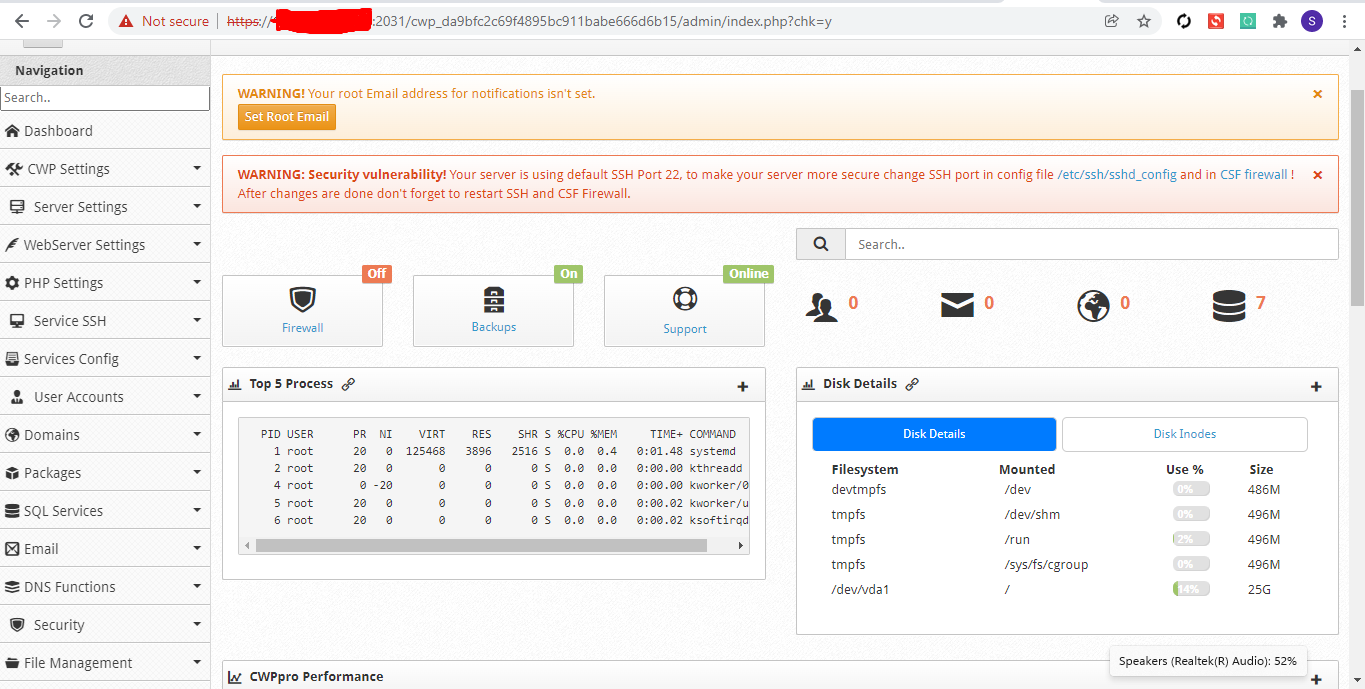
Now that that’s all done. You can spend some time exploring the features and settings of your CentOS Web Panel.