
WinSCP is an open-source FTP client for Microsoft Windows. Development began in 2000, and it is maintained by Martin Prikryl. In addition to its GUI interface, WinSCP offers batch file scripting and a command-line interface.
WinSCP offers you everything you need to connect and transfer files to your FTP server:
- Command-line options.
- Support for synchronizing files between folders on different systems.
- Transfer resume options for interrupted file transfers.
- Advanced filtering options to only see the files you need.
Table of Contents
What is WinSCP

WinSCP (Windows Secure Copy) is a popular open-source SFTP (SSH File Transfer Protocol), FTP (File Transfer Protocol), WebDAV, and SCP (Secure Copy Protocol) client for Windows. It allows users to securely transfer files between a local and a remote computer.
With WinSCP, users can connect to remote servers, browse their directories, and transfer files securely using encryption. It supports various encryption protocols like SSH-1, SSH-2, and SSL/TLS, ensuring secure data transfer over the network. Additionally, WinSCP offers features such as drag-and-drop file transfer, directory synchronization, remote text editing, and scripting capabilities, making it a versatile tool for managing remote files and servers.
Downloading and Installing WinSCP
Downloading and installing WinSCP is a straightforward process. Here’s a step-by-step guide:
- Download WinSCP:
- Visit the official WinSCP website at https://winscp.net/.
- Navigate to the “Download” section.
- Choose the appropriate installer for your system. WinSCP is primarily available for Windows, but there are also versions available for Wine on Linux and macOS.
- Click on the download link to begin downloading the installer.
- Run the Installer:
- Once the installer file is downloaded, locate it in your downloads folder or the location where you saved it.
- Double-click on the installer file to run it. You may need administrative privileges to install software on your system.
- Installation Wizard:
- The WinSCP Installation Wizard will open. Click “Next” to proceed.
- License Agreement:
- Read the End User License Agreement (EULA) carefully, and if you agree with the terms, select the option to accept the agreement. Then click “Next”.
- Choose Components:
- You can choose which components of WinSCP you want to install. By default, all components are selected. If you’re not sure, it’s safe to proceed with the default settings. Click “Next” to continue.
- Select Installation Location:
- Choose the destination folder where you want WinSCP to be installed. The default location is usually fine for most users. Click “Next” to proceed.
- Start Menu Folder:
- Select the folder where you want shortcuts for WinSCP to be placed in the Start menu. You can keep the default setting or choose a different folder. Click “Next” to continue.
- Additional Tasks:
- Here, you can choose whether you want to create desktop and quick launch shortcuts for WinSCP, as well as whether you want to run WinSCP after the installation is complete. Make your selections and click “Next”.
- Ready to Install:
- Review the installation settings you’ve chosen. If everything looks correct, click “Install” to begin the installation process.
- Installation Progress:
- The installer will now extract and install WinSCP files on your system. This may take a few moments.
- Installation Complete:
- Once the installation is finished, you’ll see a confirmation message. Click “Finish” to exit the installer.
- Launching WinSCP:
- If you selected the option to run WinSCP after installation, it will launch automatically. Otherwise, you can find WinSCP in your Start menu or on your desktop and open it from there.
Connecting and Transferring Files with WinSCP
WinSCP has made it simple to connect to your FTP server. To get started, you need only to master two things:
- The Site Manager
- The File Manager
The Site Manager
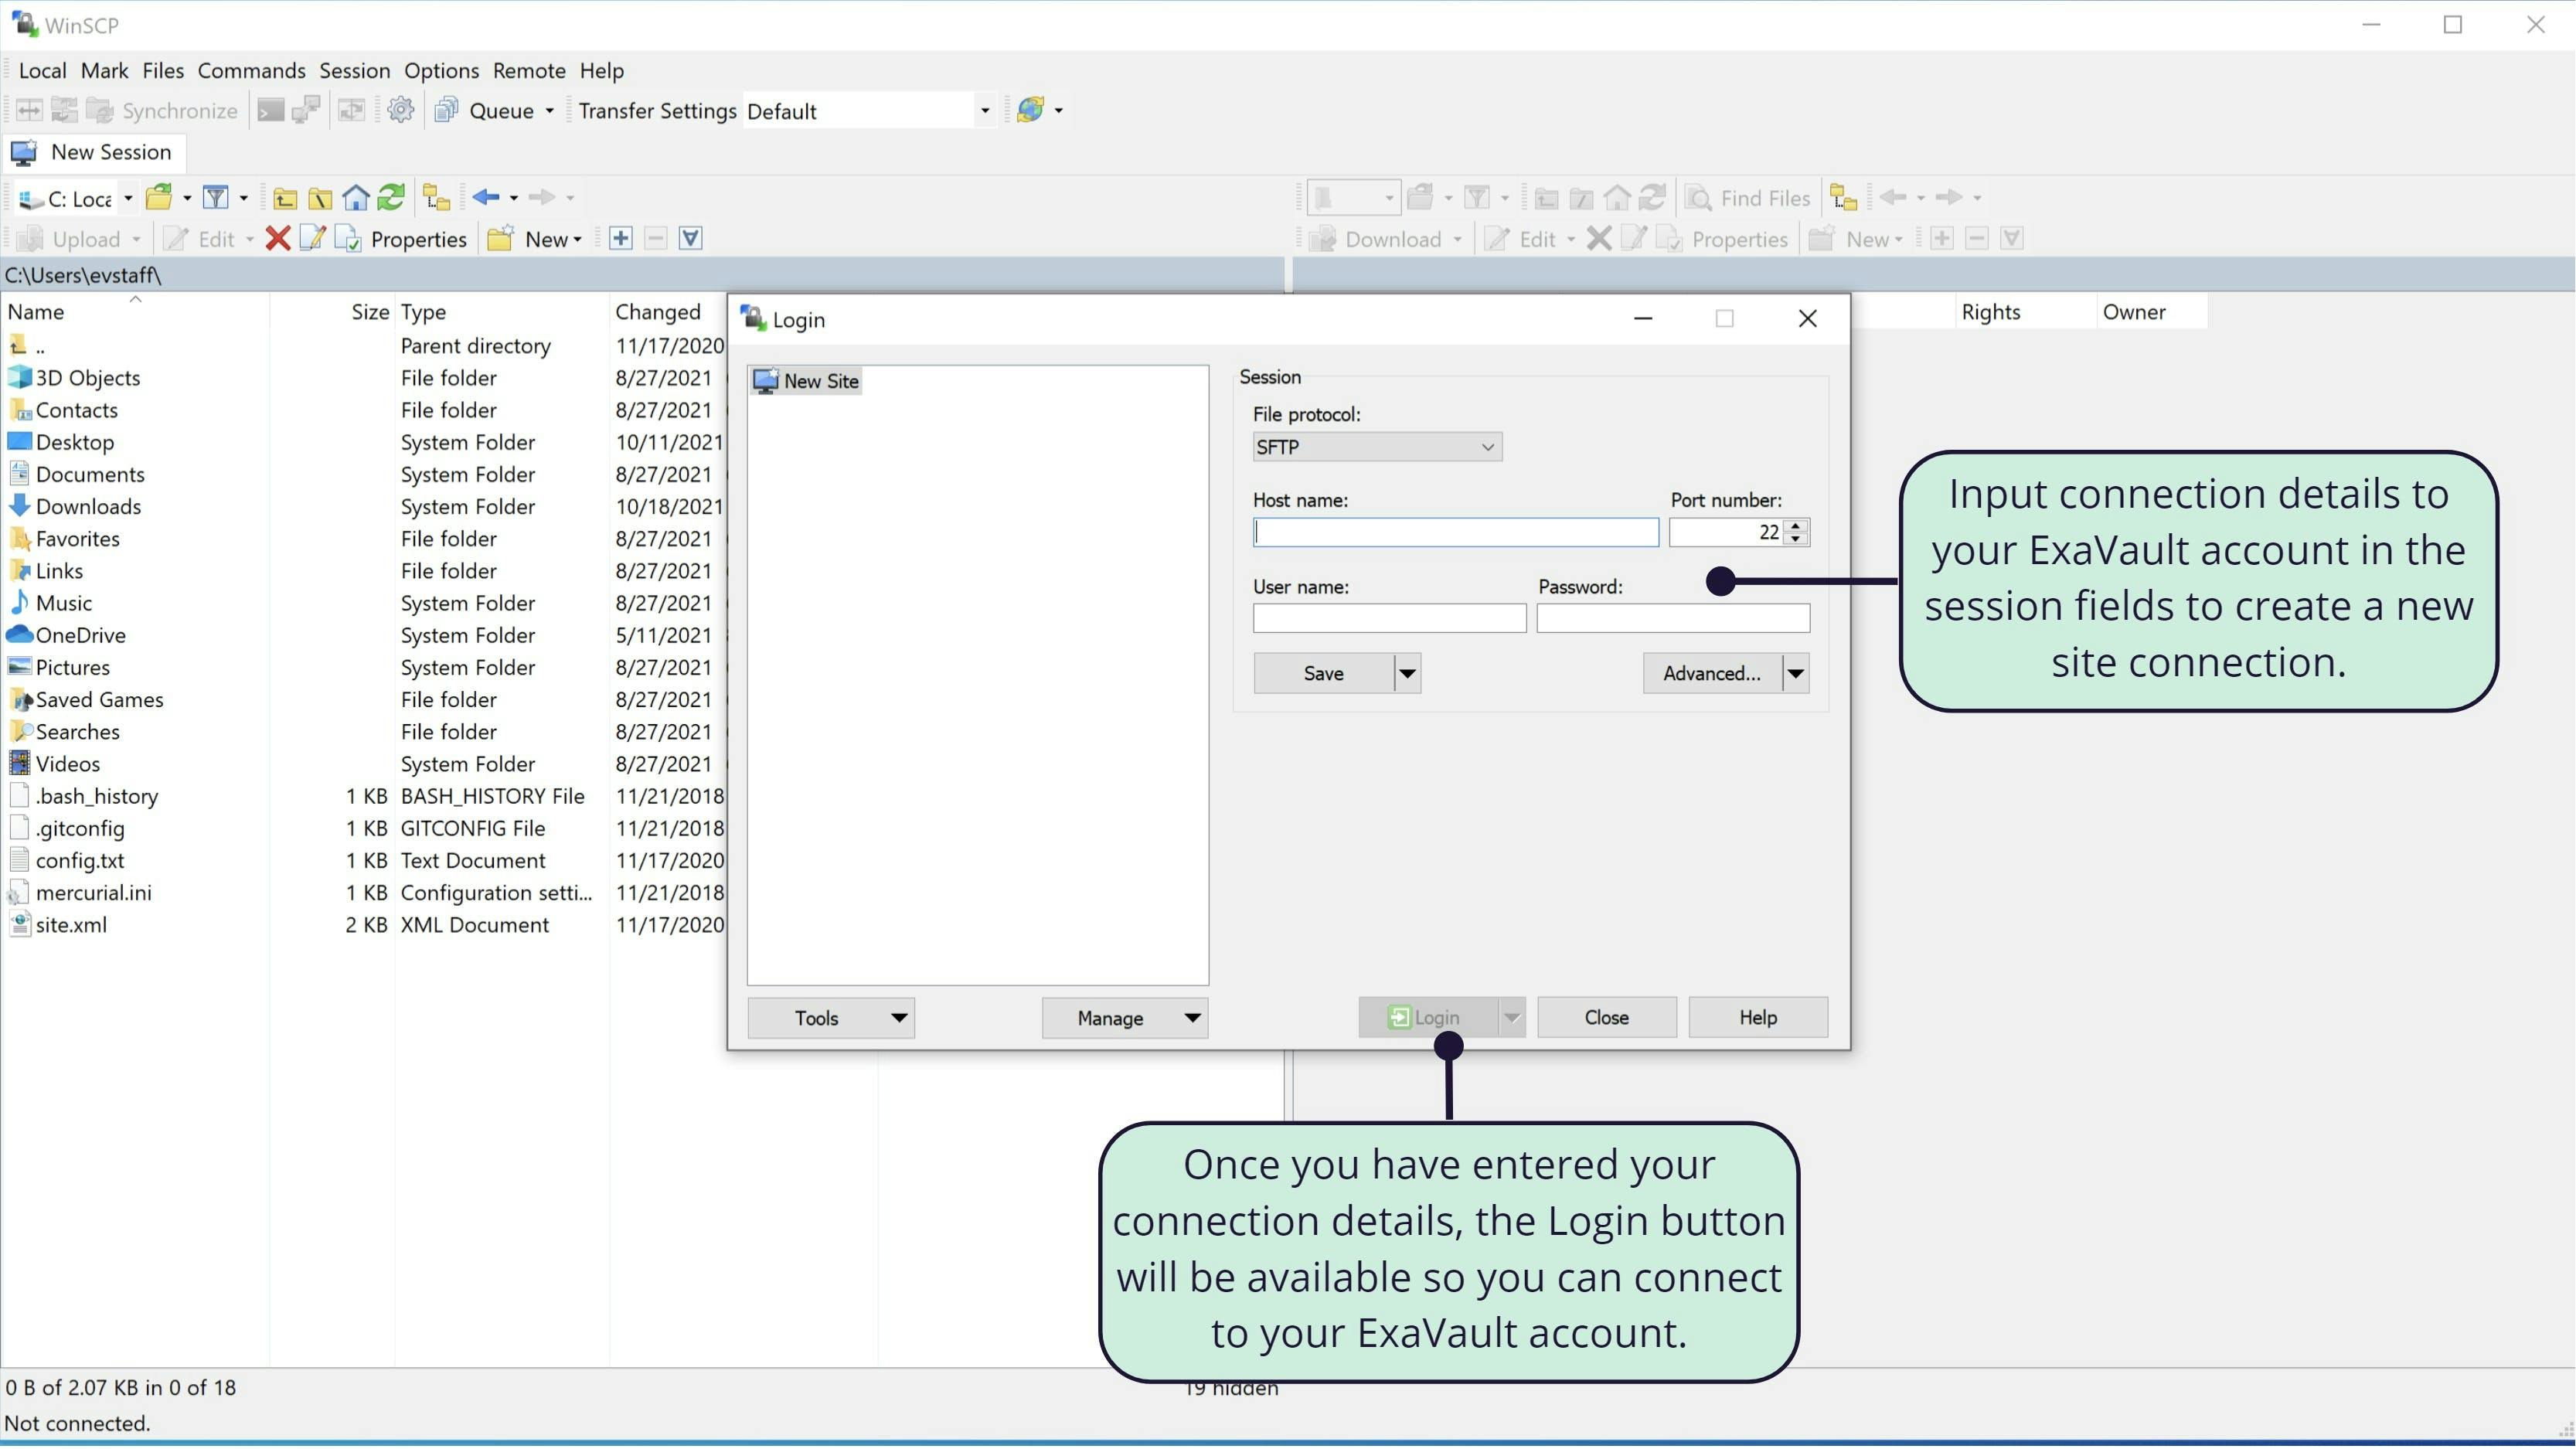
The Site Manager window appears when you first open WinSCP.
You’ll need to add connection information to the Site Manager to connect to your FTP server:
- The protocol you want to use to connect. ExaVault supports both FTP and SFTP connections. ExaVault does not support SCP or WebDav connections.
- Your ExaVault FTP server (host) name.
- Port number will change depending on the protocol that you choose, port 21 for FTP and port 22 for SFTP.
- Add your User name.
- Add your Password.
Here is what the connection to your ExaVault account might look like:
- Protocol: SFTP
- Address: bobsmith.exavault.com
- Username: bobsmith
- Password: * (be careful about handing these out!)
- Port: 22
When you are all done, you can either click the Save button to save the connection information for future connections or click Login to get connected immediately to your server.
Confirming Your Host Key
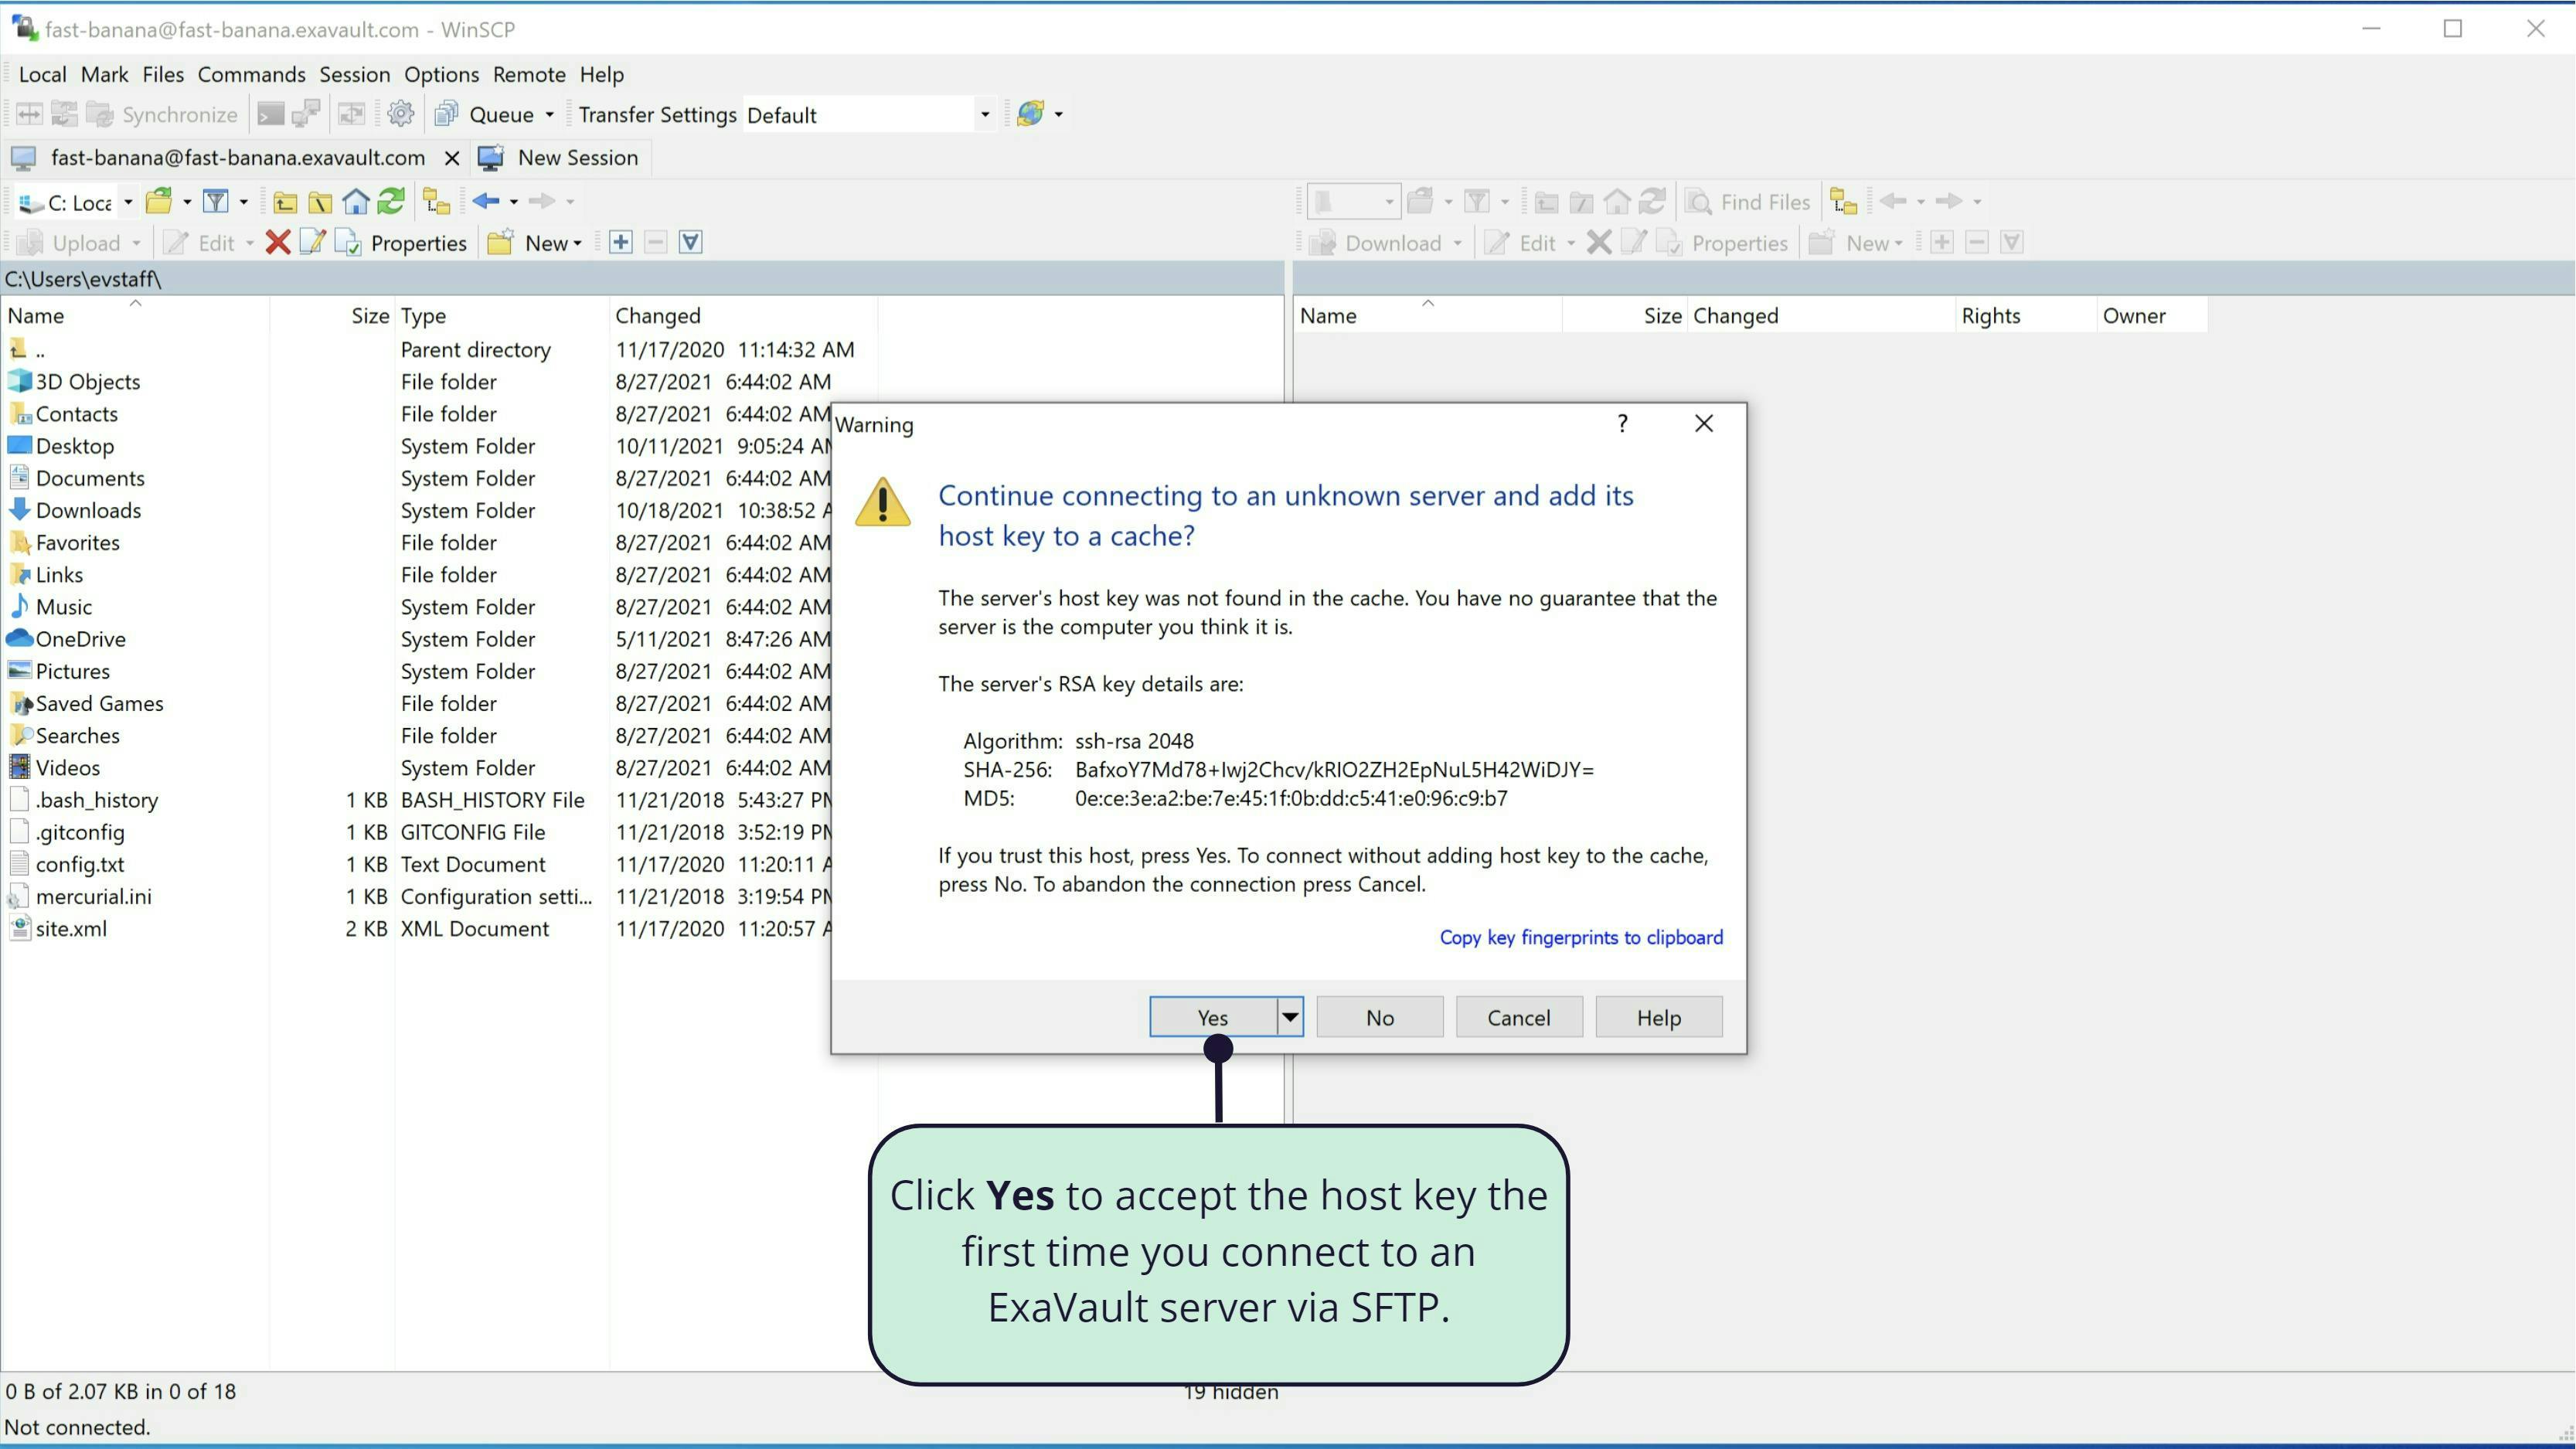
When you first connect to your FTP server, WinSCP will prompt you to accept the provided host key. Accept this key by clicking the Yes button to confirm to WinSCP that the connection is expected and add the key to the list of known hosts.
Disconnecting
You disconnect from your FTP server by selecting Disconnect from the Session menu. WinSCP will also disconnect your session if you close the application.
The File Manager
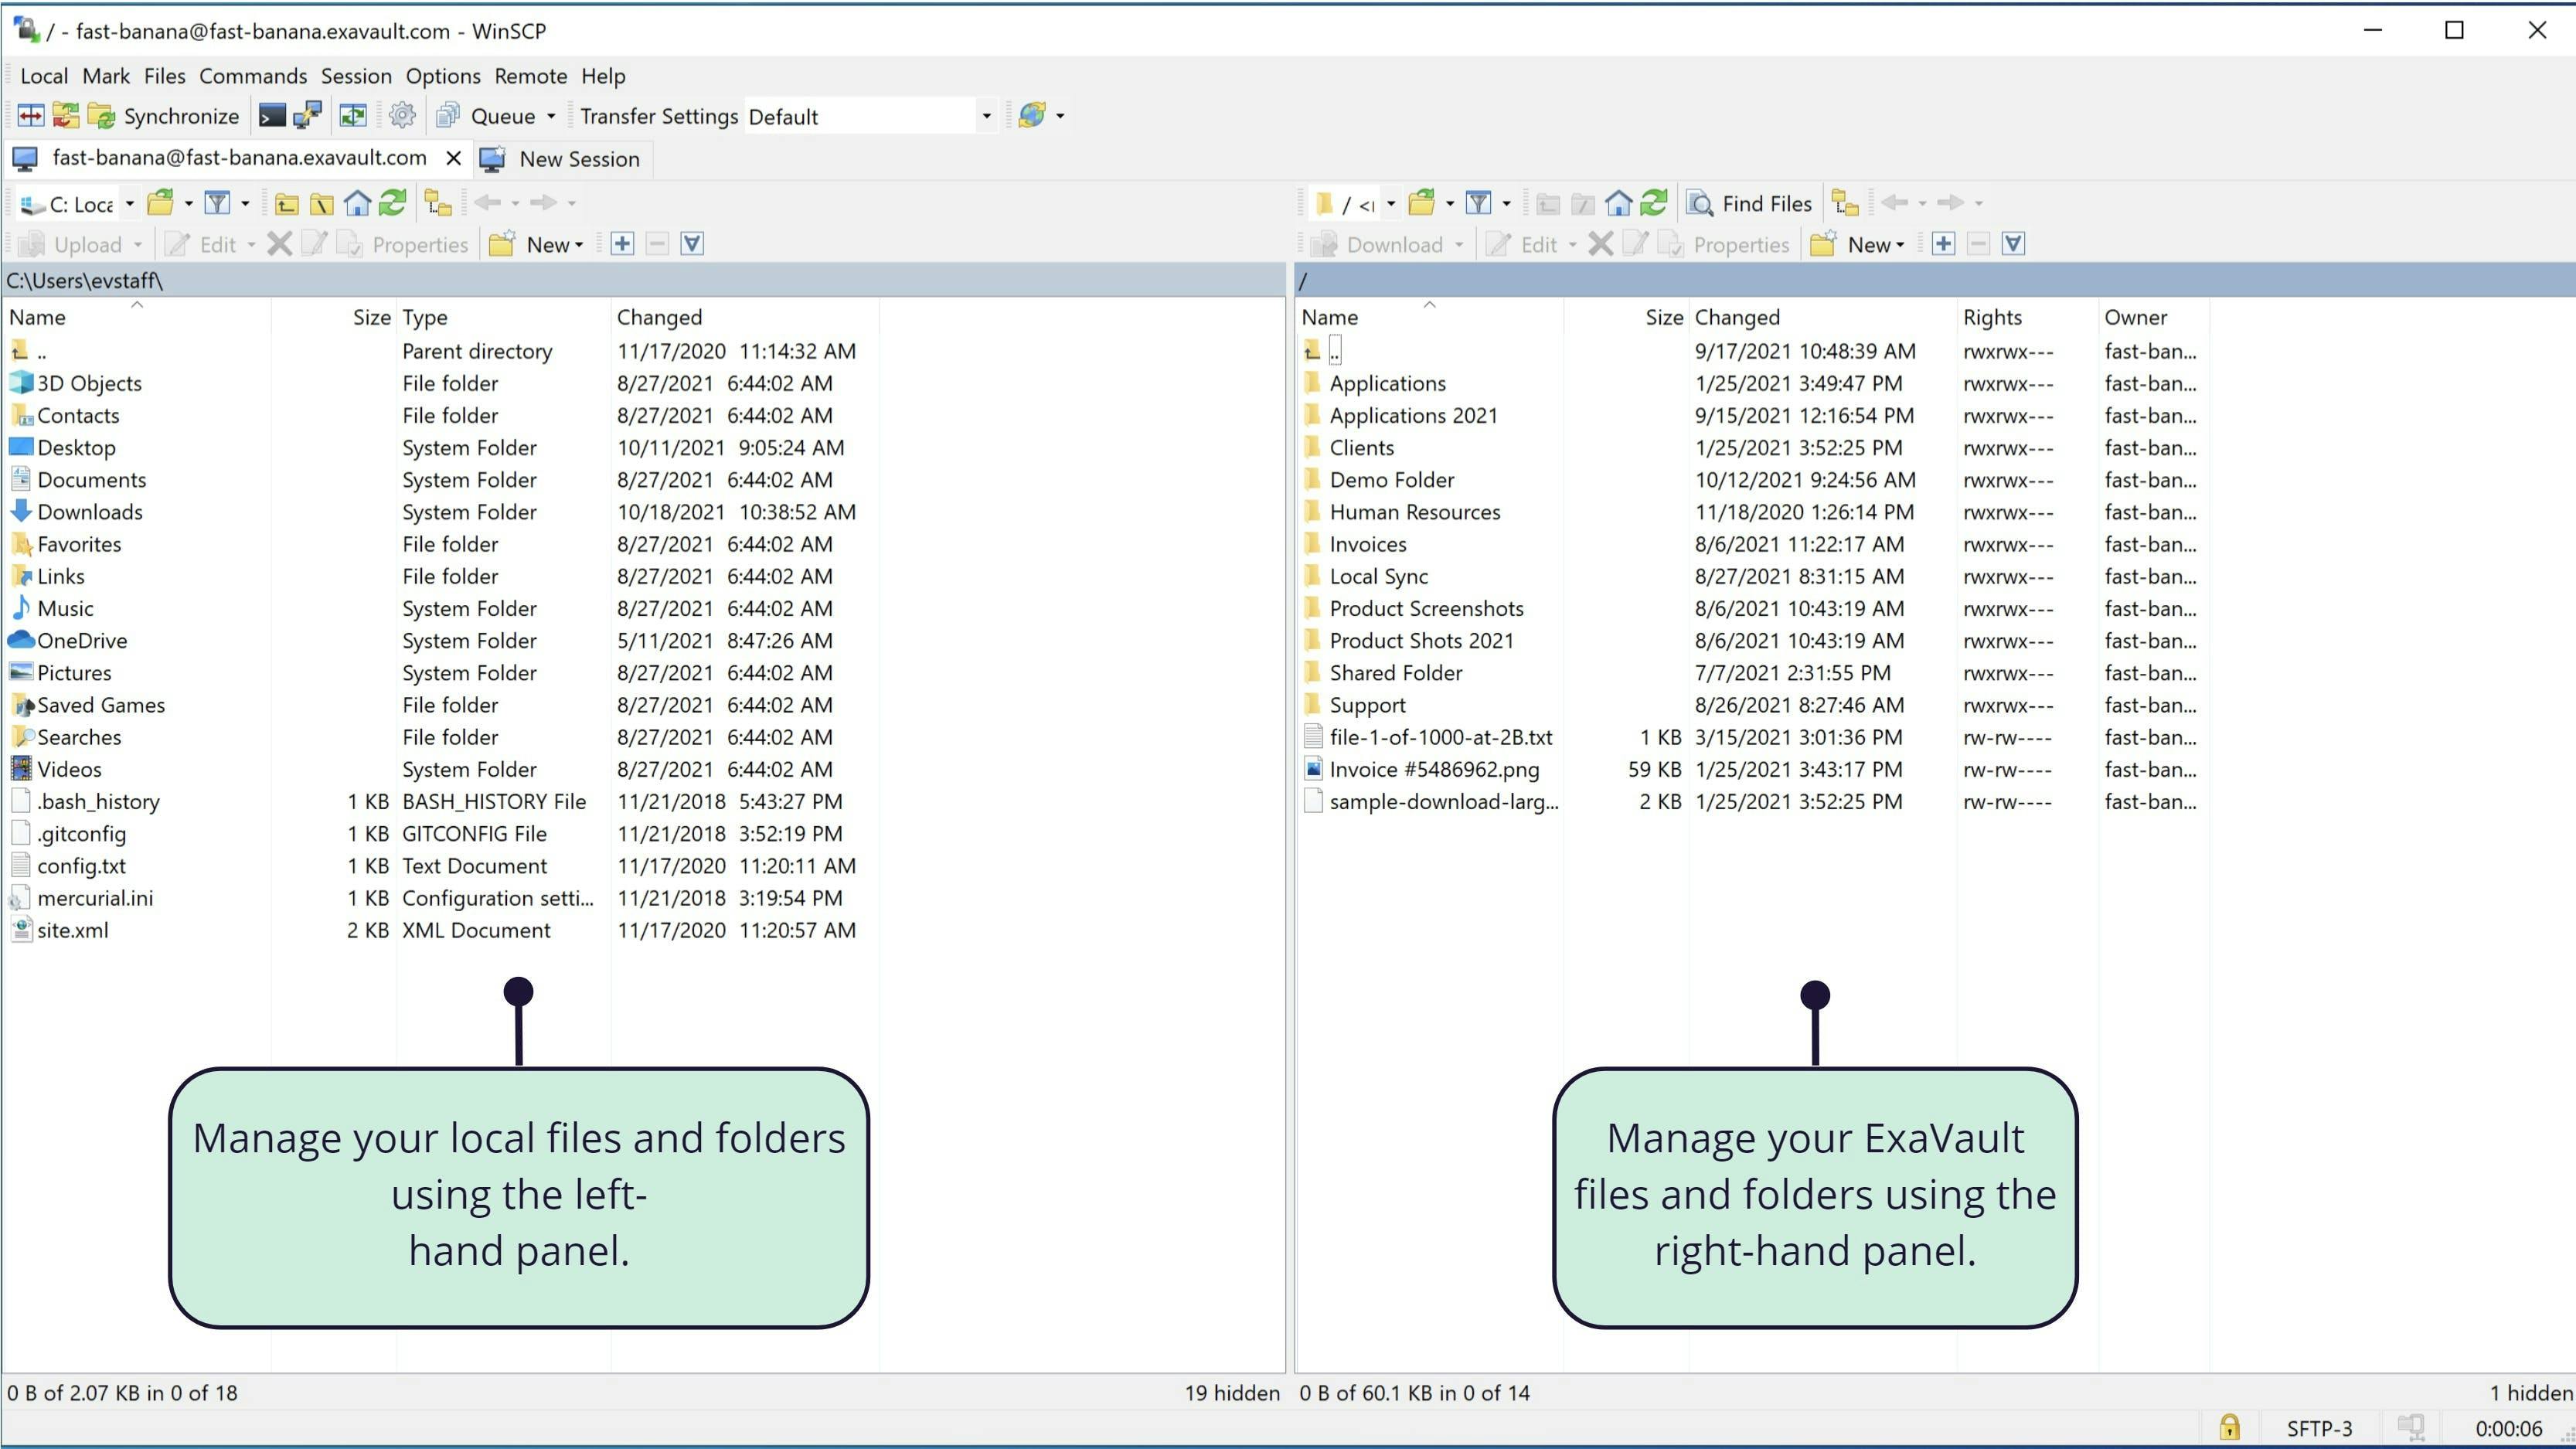
The File Manager is what transfers files. Like most FTP clients, the layout of the File Manager window in WinSCP has two sections:
- Local List
- Remote List
Local List
The Local List is on the left-hand side of the screen.
- This is a view of the files on your computer.
- The current directory is shown in the title bar just above the files and folders in that directory.
Remote List
The Remote List is on the right-hand side of the screen.
- This is a view of the files on your FTP server.
- The current directory is shown in the title bar just above the files and folders in that directory.
Transferring Files
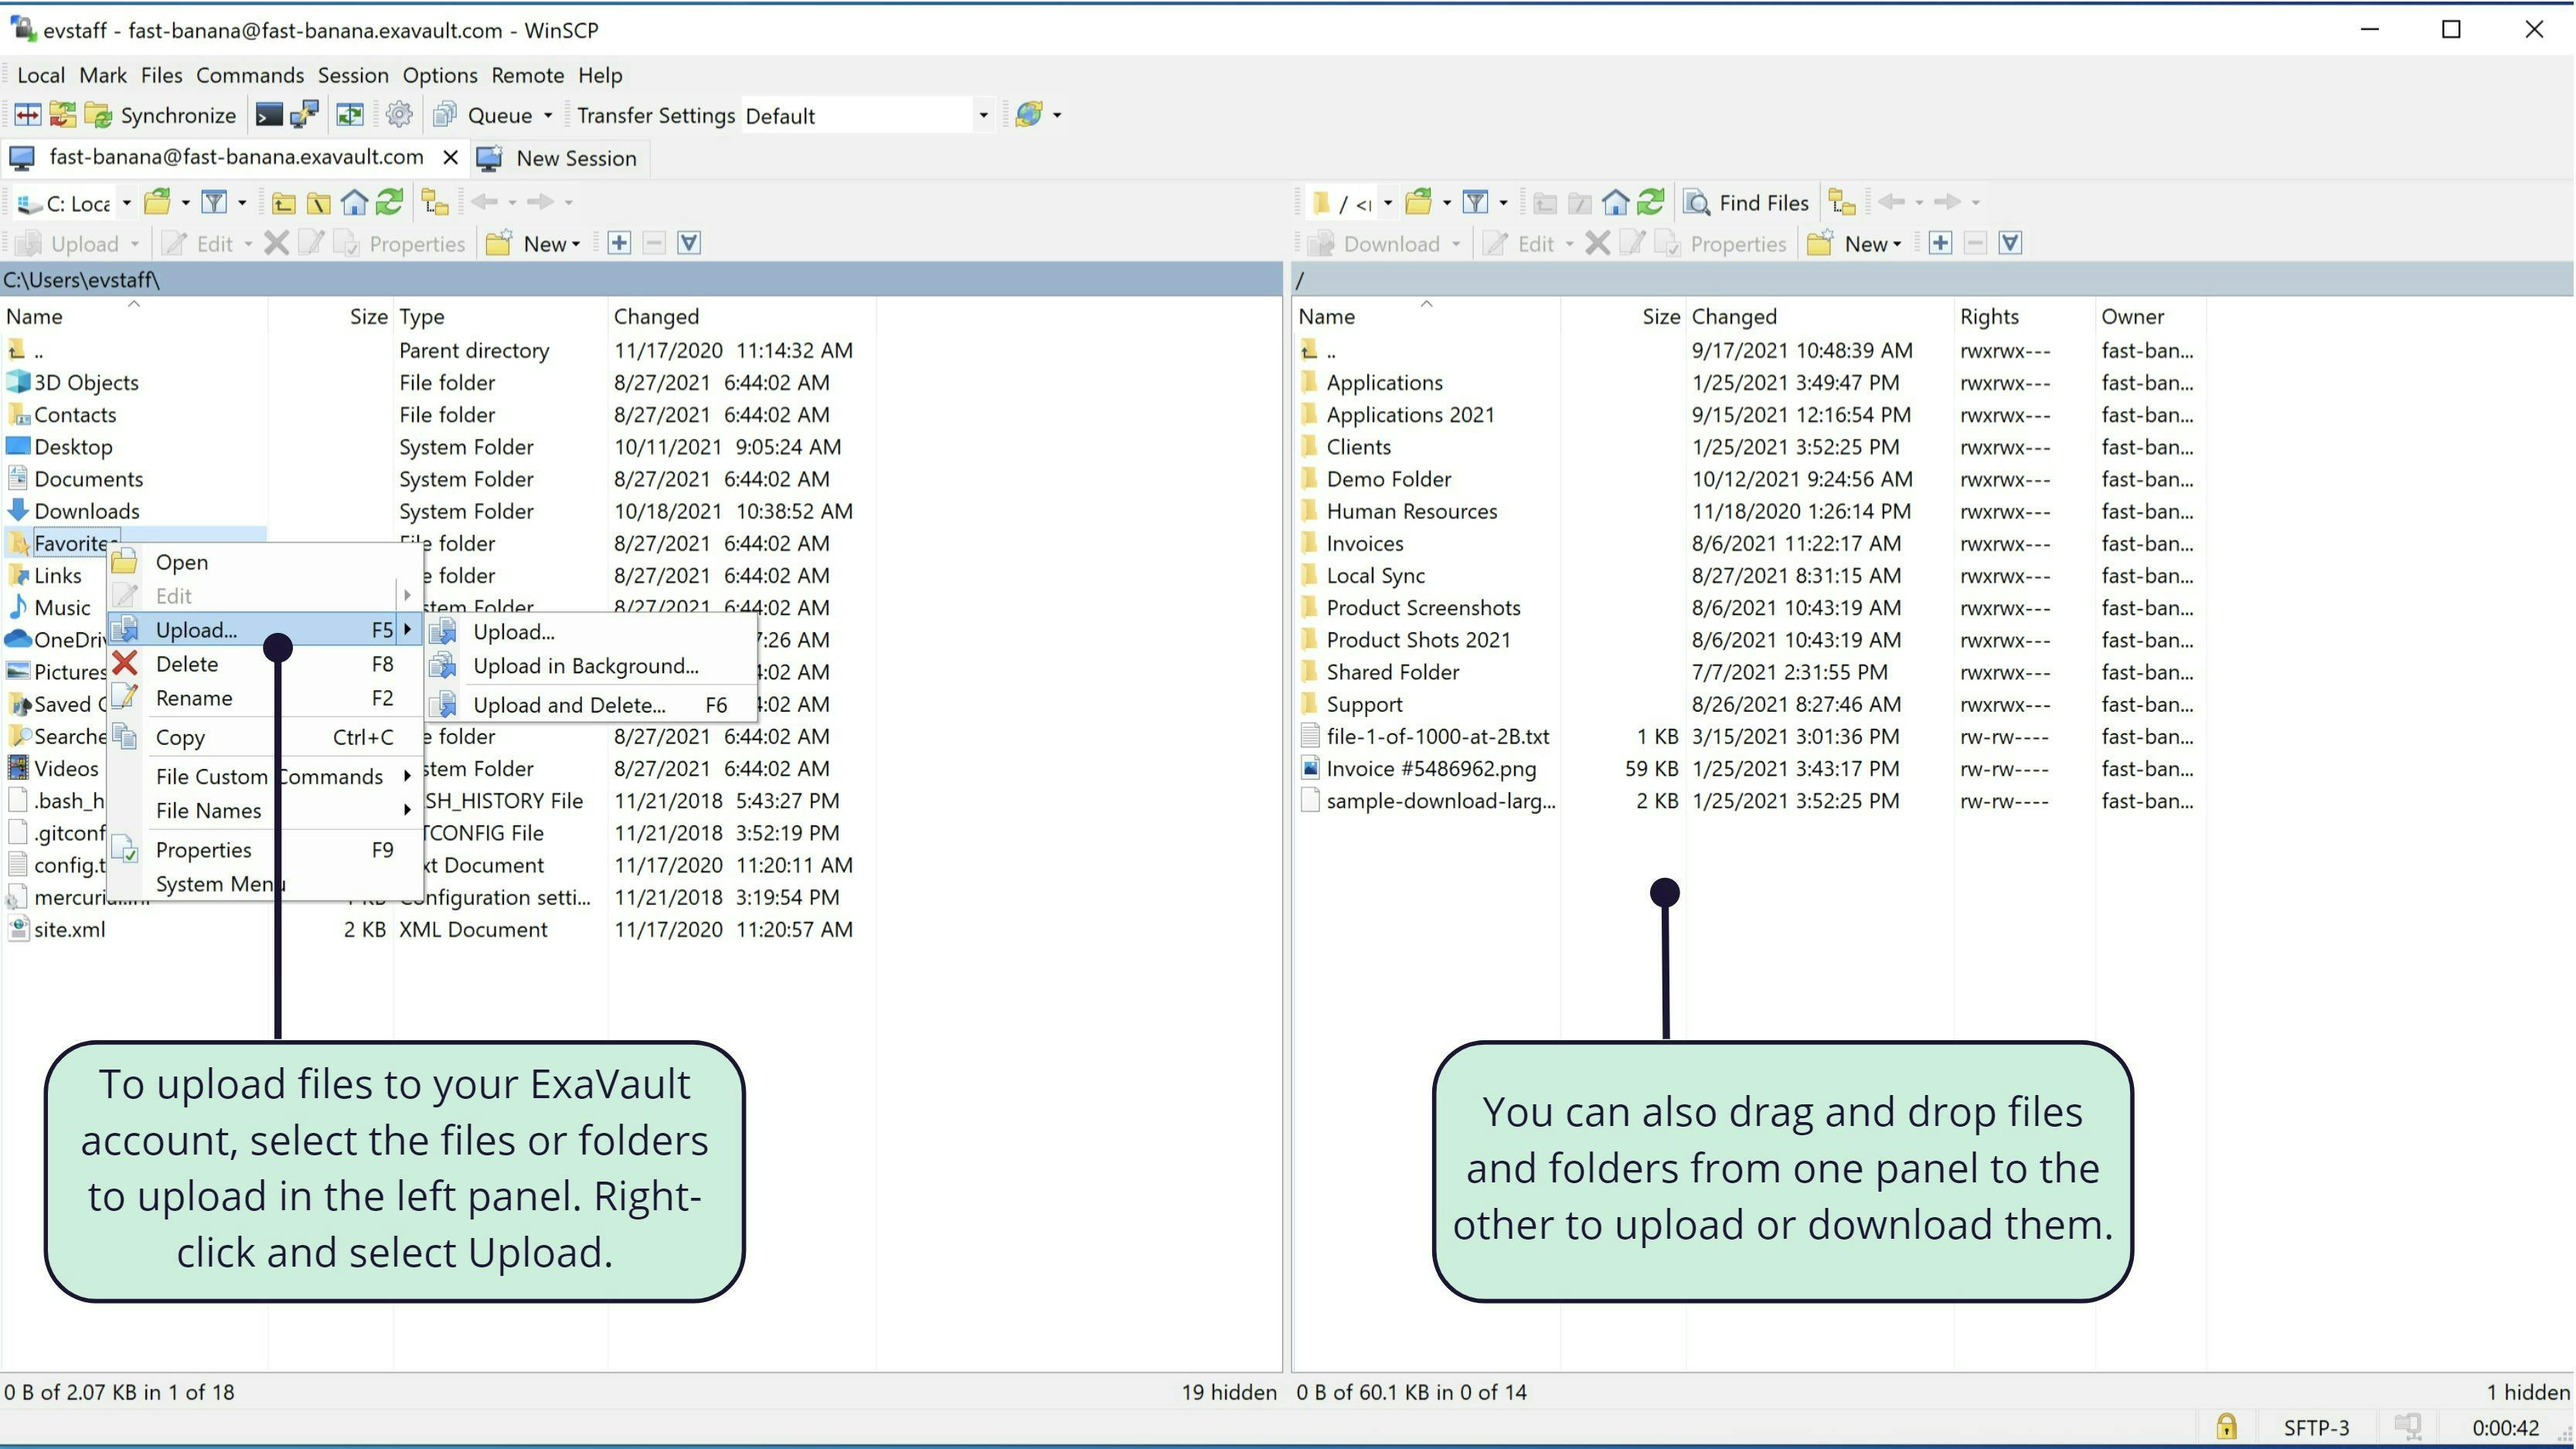
Transferring files is easy: just drag them from one side of the window to the other.
Uploading
To upload files:
1. Select the file(s) that you want to upload to the local list.
2. Drag them to the remote list or right-click on the file(s) then select upload.
Conclusion
This post primarily introduces how to use WinSCP to transfer files between computers. WinSCP stands as a versatile solution for seamless file transfers between computers, offering security and reliability. By following the provided tutorial, users can easily install WinSCP and utilize its features to transfer files efficiently.
However, it’s important to acknowledge its limitations, including limited support and complexity for beginners. For those seeking alternatives, AnyViewer emerges as a compelling option, offering enhanced support, user-friendly interfaces, and robust security measures. Whether opting for WinSCP or exploring AnyViewer, users can streamline their file transfer processes and enhance productivity effectively.